Our Definitive Guide to Caring for a Sump Pump
Our Definitive Guide to Caring for a Sump Pump
Blog Article
We have stumbled on this post relating to Cleaning & Maintenance Tips for Your Home's Sump Pump directly below on the web and accepted it made perfect sense to discuss it with you on this page.
Sump pumps are critical parts in several homes, specifically in locations prone to flooding or too much wetness. They assist avoid water damages by efficiently getting rid of excess water from basements or crawl spaces. However, like any other home appliance, sump pumps require routine upkeep to guarantee they work effectively when needed the most. Cleansing your sump pump is a vital part of its maintenance, and understanding how to do it effectively can save you from costly repair services and potential disasters.
Introduction
Maintaining a clean sump pump is vital for its appropriate functioning and long life. Neglecting this necessary job can cause obstructions, malfunctions, and ultimately, water damages to your building. Consequently, discovering exactly how to cleanse a sump pump is critical for house owners that depend on these tools to keep their basements completely dry and safeguarded.
Signs of a Dirty Sump Pump
Recognizing when your sump pump requires cleansing is important for avoiding prospective malfunctions. Some usual indicators that show a dirty sump pump consist of strange sounds during operation, minimized water circulation, and visible debris in the pit. If you observe any of these signs and symptoms, it's vital to cleanse your sump pump immediately to prevent any kind of further issues.
Preparing for Cleansing
Before you start cleaning your sump pump, it's necessary to take some safety preventative measures. Begin by shutting down the power to the pump to prevent any kind of electric accidents. Furthermore, use appropriate protective equipment, such as gloves and goggles, to shield on your own from dust, particles, and prospective microorganisms.
Recognizing the Sump Pump
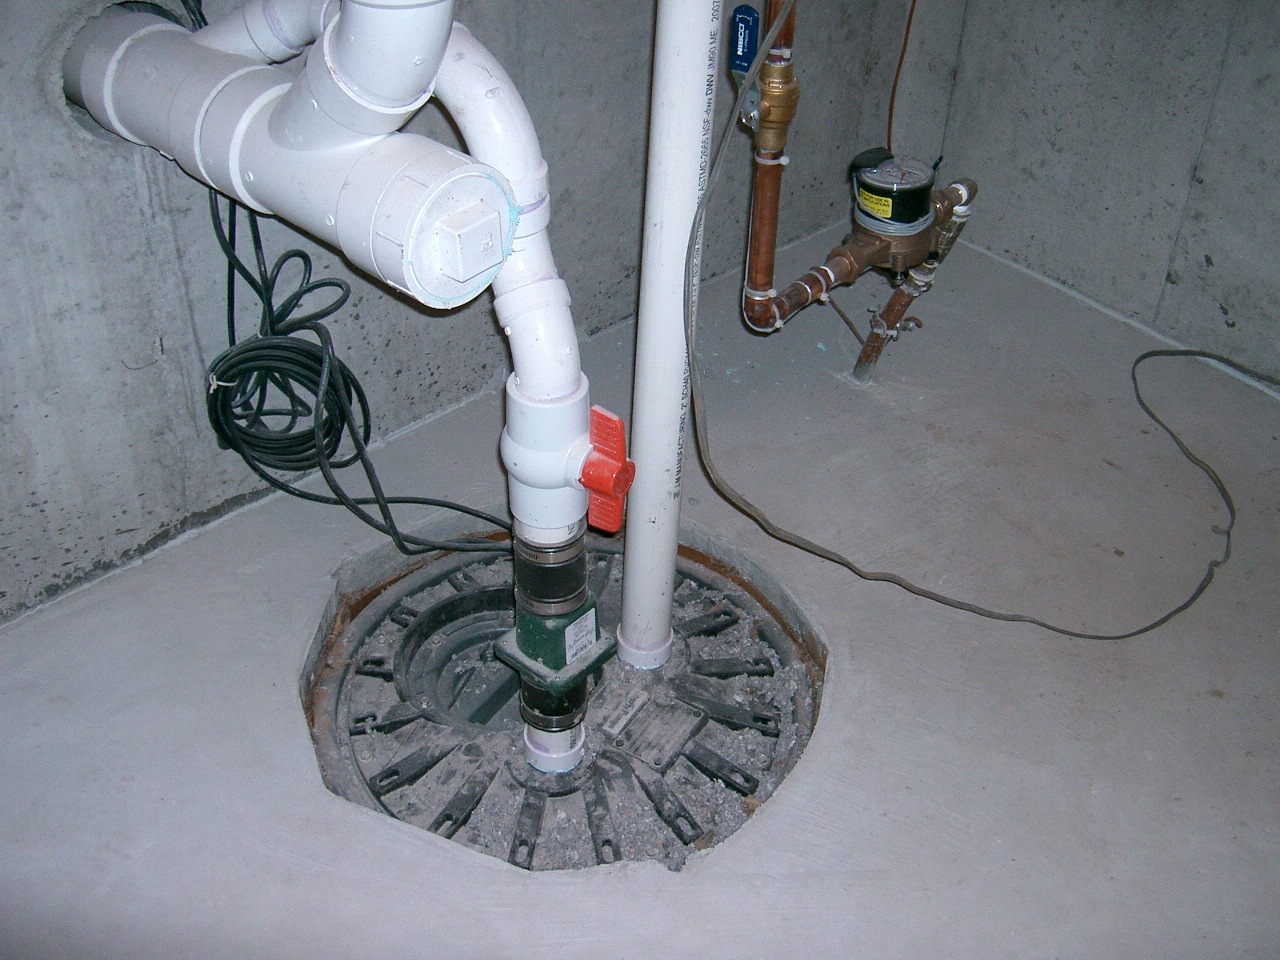
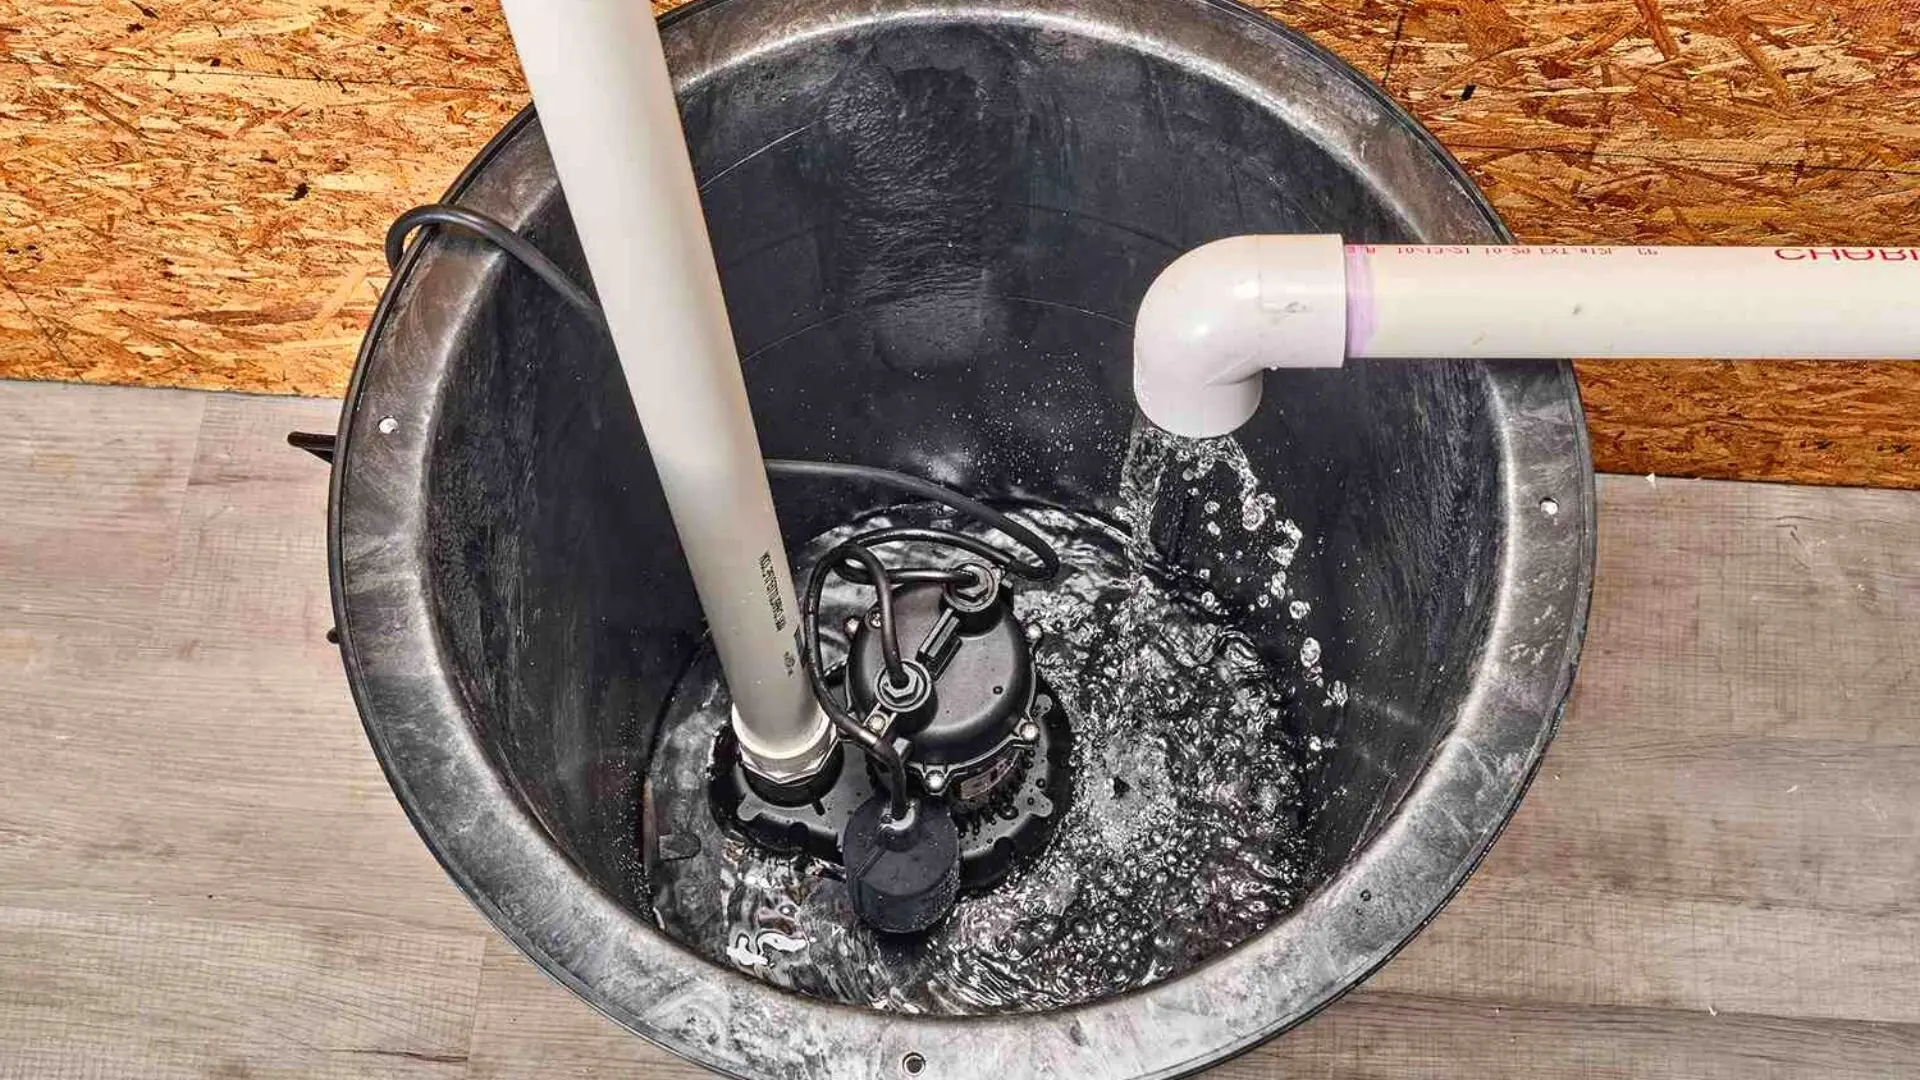
Before diving right into the cleansing process, it's essential to have a standard understanding of exactly how a sump pump works. Normally mounted in a pit or container below the cellar floor, a sump pump consists of a number of essential components, including a pump, a float button, and a discharge pipe. When water accumulates in the pit, the float button activates the pump, which then pumps the water out via the discharge pipe, far from the structure's structure.
Step-by-step Guide to Cleansing a Sump Pump
Shutting Off the Power
Begin by separating the power supply to the sump pump to prevent any type of crashes while cleansing.
Looking For Proper Performance
Prior to re-installing the pump, carry out a quick test to make sure that the float switch activates the pump properly. Pour some water right into the sump pit and observe the pump's operation. If every little thing is working correctly, you can reassemble the pump and reconnect the power supply.
Removing Debris and Dust
Utilize a pail or an inside story to remove any noticeable particles, dirt, or debris from the sump pit. Dispose of the debris effectively to stop it from blocking the pump or the discharge pipeline.
Cleaning up the Pump and Drift Switch Over
When the pit is free from debris, thoroughly get rid of the pump from the pit. Examine the pump and the float button for any indications of damages or wear. Use a soft brush or fabric to cleanse the surfaces and remove any type of accumulated gunk.
Flushing the System
After cleaning up the pump and float button, purge the sump pit with tidy water to get rid of any continuing to be dust or sediment. This will aid ensure that the pump operates efficiently and efficiently.
Upkeep Tips to Maintain Your Sump Pump Clean
Along with regular cleansing, there are a number of upkeep pointers you can follow to maintain your sump pump in ideal condition:
Conclusion
Cleansing your sump pump is a crucial facet of its upkeep and makes sure that it runs effectively when you require it the most. By following the actions laid out in this overview and incorporating normal maintenance right into your routine, you can expand the life-span of your sump pump and secure your home from water damages.
6 STEPS ON HOW TO CLEAN A SUMP PUMP PROPERLY
UNDERSTANDING SUMP PUMPS
Your sump pump plays a crucial role in protecting your home by managing and removing excess water. It primarily functions as a “shield”, guarding your basement against the damaging effects of water accumulation. The pump is housed in a sump pit in the lowest part of your basement, and its job is to pump out any water that collects there.
During heavy rainfalls or when snow melts rapidly, water can infiltrate your basement, posing potential risks like flooding, structural damage, and harmful mold growth. Here, the sump pump springs into action, pumping out the intruding water and directing it away from your home.
SAFETY FIRST
Before cleaning, remember to prioritize safety. Disconnect the sump pump from the power source to prevent any accidental electric shocks. Also, wear sturdy gloves to protect your hands from any sharp or dirty components within the pump.
REMOVE THE SUMP PUMP
After ensuring your safety, the next step is to remove the sump pump from its pit. Doing this might require careful maneuvering as you don’t want to damage any pump components. Once removed, clean the sump pit to remove any accumulated debris or sludge.
INSPECT THE PUMP
Inspect the pump for any visible signs of wear or damage. Check the power cord, float switch, and impeller housing. If any components look worn out or damaged, consider replacing them to ensure optimal performance.
CLEAN THE PUMP
Thoroughly clean the pump with warm, soapy water. Make sure to rid it of any dirt, gravel, or other debris that might impede its performance. You can use a toothbrush to clean the small, hard-to-reach parts of the pump.
REINSTALL THE SUMP PUMP
Reinstall the pump into the sump pit Make sure it’s positioned correctly to remove the water effectively Once it’s back in place, reconnect it to the power source TEST THE PUMP
Finally, pour some water into the pit to ensure the pump works correctly. It should start automatically and begin pumping out the water; if it doesn’t, check the power source and the positioning of the pump.
Remember, while cleaning your sump pump is an essential part of home maintenance, hiring a professional plumber for a thorough inspection and cleaning at least once a year is also important. This will ensure that your pump is in optimal condition, ready to protect your home from potential water damage.
BEST PRACTICES FOR CLEANING SUMP PUMP DISCHARGE PIPES
Regular Inspection: Regularly inspect your discharge pipes, especially during heavy rainfall or snowmelt periods. Look for any signs of blockage or damage. Early detection of problems can prevent serious issues down the line. Periodic Cleaning: Over time, sediment and debris can accumulate in the discharge pipes, impeding the flow of water. Regular cleaning helps keep the pipes clear and functioning efficiently. You can use a high-pressure water jet to effectively clean the pipes. Insulation During Winter: In colder climates, discharge pipes can freeze, blocking the outflow of water. Protect your discharge pipes from freezing temperatures by insulating them with foam pipe insulation. This will ensure the sump pump can continue to discharge water even in freezing conditions. Proper Positioning: The discharge pipe should be positioned to direct water away from your home’s foundation. Improper positioning can lead to water seeping back into the basement. Ensure the pipe is long enough and angled correctly. Installation of a Check Valve: A check valve prevents water from flowing back into your sump pit after the pump has pushed it out. Installing a check valve helps maintain the efficiency of your sump pump and reduces the risk of flooding. Minimize Pipe Turns: Every curve or turn in the discharge pipe can decrease the efficiency of water flow. By minimizing turns and bends in your discharge pipe, you can increase the efficiency of your sump pump. https://www.fullspeedplumbing.com/how-to-clean-a-sump-pump-properly9999/
As a person who reads about Steps to Cleaning Your Sump Pump Properly, I figured sharing that piece of content was smart. In case you enjoyed our page plz be sure to share it. I truly appreciate reading our article about How To Effectively Clean A Sump Pump.
Call Today Report this page